
ABOUT THE INSTRUMENTS
Steinberg's Cubase Pro and Cubase Artist both include a GM-compatible multi-timbral synth plugin called HALion Sonic 2 SE. While this particular version of the plugin only works in Cubase, Steinberg sells the full version of HALion Sonic 2 as a standalone product which works in any Mac or PC DAW with AU or VST support. You can also get a full version of HALion Sonic 2 in Steinberg's Absolute VST Instrument Collection.HALion Sonic itself is a "player" version of Steinberg's powerful HALion 5 sampler. (The HALion 5 package includes a copy of HALion Sonic 2 as well.) Like HALion Sonic, HALion 5 works on Mac or PC, and ships in 32-bit and 64-bit flavors. Both products also sport full General MIDI compatibility.
USING THE INSTRUMENTS WITH LIVE
- Create a new, empty Live set and press TAB to enter Arrangement view. (Session view technically works, but if your MIDI file contains time signature or tempo changes, Arrangement view is more appropriate.) Drag your General MIDI file from the Live browser into your Live set. If it's a Type 1 file, all the tracks in the file should end up on separate MIDI tracks in separate MIDI clips in the Live set.

If it's a Type 0 file, Live will only import a single MIDI clip/track, regardless of how many musical parts the song contains. You will have to convert the file to Type 1 and start over. See the first article in this series to learn how to convert MIDI files. - For each new MIDI clip that Live created, select the MIDI clip and look at its Pgm Change settings in the Notes panel of the clip view. Each imported track (except for maybe the drum track) should at least have a Program Change value selected.

If the current clip is not a drum channel, and you see no Pgm Change setting, Live might not have properly detected program change events for that track. See the first article in this series to learn how to locate program change numbers in MIDI files.Note: If your MIDI file contains program changes that occur within the song (if a single musical part changes tones as the song progresses) you will have to split those MIDI clips into separate clips so you can set the correct program change value on each clip individually. MidiYodi tells you where in the song the program change events occur, so they should be relatively easy to locate in your Live set.
- Go to Create > Insert MIDI Track to add a new empty track in your project, and then drag your plugin of choice (HALion 5 or HALion Sonic) into the track's Device View area. (Don't use a track that already has a MIDI clip on it; doing so will cause headaches if you ever want to mute or solo individual tracks.)

- HALion 5 only: If you are using HALion 5, click the Load Multi-Program button and then double-click General MIDI Multi to prepare HALion 5 with a 16-part GM-ready configuration.

- In HALion 5, click Options and scroll down to the MIDI CONTROLLER section. Make sure to enable both Program Changes and RPNs 0/1/2.

In HALion Sonic 2, click Options and then select GM Mode under Program Changes in the Global section of the page. The plugin will automatically populate all channels with some default instruments.
- For each MIDI track that has a MIDI clip on it, change the Output Type setting to point to the track where you loaded your virtual instrument plugin, and change the Output Channel setting to the MIDI channel you want to use for that part. For the most part the actual channels you choose don't matter (so long as they're different from each other), however, you should only use channel 10 for your drum parts (parts that actually use the multi-sample GM drum layout).

- Now try playing your song!
If you find that either HALion 5 or HALion Sonic 2 aren't loading the correct patches, or something just doesn't sound right, check these things:
HALion 5 playing an imported General MIDI file. - Each MIDI clip (except perhaps the drum track) has a Program Change setting.
- You are using the correct Program Change values (remember, they should be the MidiYodi value plus 1 because of how Live numbers program changes).
- Make sure your drum track is routed to MIDI channel 10, and that you have a GM drum kit loaded on that channel in your plugin.
- You started playback from the very beginning of the song, since the program change events only fire at clip start. Click the Previous Locator button several times to make sure you're playing from the beginning.
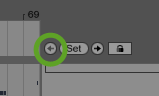
The Previous Locator button.


No comments:
Post a Comment