Showing posts with label samplerobot. Show all posts

Tuesday, April 8, 2025

SOLUTION: Correctly Importing SampleRobot instruments to Waldorf Quantum and Iridium

 As a long-time user of SampleRobot and a recent owner of a Waldorf Iridium Core synthesizer, I was excited to learn that SampleRobot 6 has explicit support for the Waldorf Iridium and Quantum instruments. After working with the synth for several days, however, I encountered a number of unexpected roadblocks when attempting to import my own SampleRobot recordings into my Iridium Core that the existing documentation and tutorial videos didn't cover. After a couple days of research and experimentation, I have finally figured it out, and wanted to share my findings for future users.

Recent developments

So far I have only found one video describing the process of importing SampleRobot instruments, and it's the one Waldorf published to their YouTube channel, however that video glosses over a very important fact: If you follow their steps exactly as described, it will work at first- but only if you leave your USB drive or SD card inserted in the synthesizer. If you try to load any instruments you created without the original storage device connected, the synth will complain that it can't find the samples!

If you want to permanently import your SampleRobot instrument without having to leave the USB/SD storage connected, you must import the samples into flash memory, and create the instrument from there. But that leads us to another problem: YouTuber Tim Shoebridge has the most popular video that covers the process of importing samples into a Quantum or Iridium, and it is very good, but it was recorded before the 3.0 update to the Iridium system software, which changed how sample storage works. His steps involve using an "Import" action which no longer exists in current Iridium/Quantum software. That functionality has been combined with the pre-existing "Add" action, but the workflow is different from what you'll see in Tim's video.

My steps below will show you how to correctly (and permanently) import your SampleRobot instruments into your instrument, as of the 3.2.0 version of Iridium Core OS (January 16, 2024).

Importing the samples

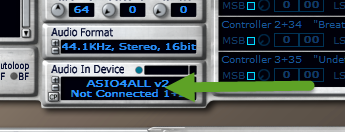
These steps assume you have already recorded your instrument in SampleRobot and exported the project in "Waldorf Quantum and Iridium (*.map)" format. I am a heavy SampleRobot user, and have already written some guides on working with it. If you'd like to see some more info on using it to make instruments for Quantum/Iridium, let me know.

First off, after you export your instrument to Waldorf format, make sure that you copy the resulting files to your USB drive or SD card exactly as follows: The USB drive/SD card must have a directory named "samples" at the root, and that directory must contain one or more instrument directories, each one containing the instrument's samples and MAP file. There can be other stuff on the drive/card, but all your Waldorf files must follow the above directory structure.

In this image you can see we have a USB drive named "IRIDIUM" and it contains a folder named "samples" with a subfolder named "The Giant Piano" which contains all necessary samples, plus the MAP file.

Note: Because some physical buttons on these devices have the same text as some on-screen buttons on the touch screen, I will try to use the word "press" for physical buttons and "touch" for on-screen controls.
  1. Insert your USB drive or SD card into your synthesizer.
  2. Press the physical Load button on the synth.
  3. On the Load Patch screen, touch Init to create an empty patch.
  4. Press OSC 1.
  5. Touch Wavetable and then touch Particle to select the standard sampler engine.
  6. Touch Actions, and then touch Add.
  7. In the upper-left corner of the touchscreen, toggle to the correct storage device for your samples (USB Drive or SD Card).
  8. In the left pane of the touchscreen, touch samples.
  9. In the right pane of the touchscreen, touch the directory name of the instrument you want to import (for the instrument in my screenshot above, I'd touch "The Giant Piano").
  10. Leave the directory name selected (don't select any individual files), and then touch Add.
  11. An "Add Samples" dialog will appear, asking if you want to copy the files to internal flash memory. Touch Copy.
  12. The samples will be copied into the "samples" directory on the synth's internal "Samples" storage. (For example, my "The Giant Piano" directory now appears between the factory "Tanya Samples" and "Vocal chika" directories in my internal storage.)

Loading the instrument map

The MAP file contains all the information your Waldorf synth needs in order to place each sample in the correct pitch and velocity ranges.
  1. With your USB/SD storage still connected, press the physical Load button.
  2. On the Load Patch screen, touch Init to create an empty patch.
  3. Press OSC 1.
  4. Touch Wavetable and then touch Particle to select the standard sampler engine.
  5. Touch Actions, and then touch Load Map.
  6. Use the touchscreen to navigate inside the original directory that contained your samples on your USB stick or SD card, and touch the name of the MAP file. (In my example, I'd navigate to "USB Drive > samples > The Giant Piano > The Giant Piano.map".)
  7. Touch Load.
Your samples should now be mapped the way you set them up in SampleRobot.

Testing and saving the instrument

You should now have a very basic sample-mapped instrument. Use the pads or fire up your DAW to play around with it to make sure your velocity layers are mapped properly (if you used more than one layer) and the pitches are mapped across the keyboard as you expected. You can make the necessary changes in the Timbre page of OSC 1, on a per-sample basis if only minor changes are needed. If you find massive changes are required, it might be best to go back to SampleRobot and re-record. (Again, if anyone needs tips here, let me know.)

Your freshly-imported instrument has a "gated" envelope (extremely fast attack and release) and does not adjust volume in response to velocity changes. It WILL trigger the appropriate samples if you imported multiple velocity layers, but it won't adjust their playback volume without some modifications.

To change the amp envelope to attack/release like you want, press the Envelopes button, and then make the appropriate adjustments on the Amp tab. (For example, I increased the Release to 1.54 seconds for my piano instrument.)

To make the instrument adjust volume in response to different velocities, touch Mod Targets on the Amp tab and then dial in the appropriate "Amp VeloAmt" value. In my case, 80% gave me the best velocity curve for my MIDI controller and playing style.

When your instrument is ready to save, do the following:
  1. Press the physical Save button.
  2. Enter a name for your patch and fill out the appropriate attributes. (I put all my patches into an "ultimateoutsider" bank so I can find everything I've created quickly by just selecting that bank in the preset browser.)
  3. Touch the blank space beneath the Save and Cancel buttons on the touchscreen to bring up the patch number entry dialog.
  4. Type in a patch slot number as a starting point to find where to save your patch. At least on my unit, the first available patch slot was 164. You can use the selector dial to scroll through existing patch slots until you find a blank one.
  5. Touch the red Save button to store the patch in the current slot.
And that's it! I do hope I save some future Waldorf-owning SampleRobot fiends some time with these updated steps!

Sunday, March 22, 2015

Recording Virtual Instruments with SampleRobot Part 6: Tips and Troubleshooting

This the sixth and final post in my series on sampling virtual instruments with SampleRobot. (Part 1 is here.) In this post I'm just going to list some troubleshooting tips and other observations that I couldn't fit into the other articles.

TROUBLESHOOTING POPS IN RECORDED SAMPLES

If the samples you record with SampleRobot end up having unexpected pops in them, that's a sign your computer was running out of sample buffer while recording. If you open up the samples in an editor like Audacity or WaveLab, you'll probably see something like this:

In both of these examples, you can see that the in the otherwise consistent and uniform waves in these samples, there's an abrupt glitch in the waveform, and this is where you hear a loud pop. What happened is that the sample buffer that was employed during the SampleRobot recording ran out of data, resulting in the loss of a small portion of the audio, similar to what would happen if you pressed pause twice while making a tape recording.

In my own work, I've only experienced this issue when using the virtual cable methods (and more often when using ASIO4ALL instead of just using VB-Cable directly). It could potentially happen when doing the analog interface-to-interface method, though. Here are some things to try when you run into this issue:
  • The VB-Cable download package includes a control panel utility, even though the control panel is not actually installed on your system when you install the driver. When you extract the ZIP file that you downloaded from VB-Audio, you'll find the VBCABLE_ControlPanel.exe file inside. Just run it from the extracted folder.
    In the Options menu you can choose different "latency" settings (really you're just selecting a sample buffer size), and you can also adjust VB-Cable's internal sample rate. This sample rate is different from the input/output rates of program audio that you may be passing through the virtual cable. I'd recommend leaving both of these values at the maximum (7168 samples, 96000 Hz), although if you've tried all other tips below and you're still having problems you might try reducing the Internal SR (sample rate) setting to something closer to your recording rate. This will put less of a burden on your system and give you more mileage with the current sample buffer.
  • Generally you also want to make sure that you've both been playing out of your instrument and recording in SampleRobot at the same sample rate and bit depth. Check your instrument/plugin host settings to make sure they sync up with what SampleRobot is expecting. Also, you may have noticed in my screenshot above that I had my VB-Cable set to 24-bit for input. This is due to a setting I made in the Sound control panel of Windows:
  • If you are using ASIO4ALL, remember that sample buffers are device-specific. You have to actually have the specific device selected before adjusting the buffer size slider. With ASIO4ALL I find I pretty much always have to crank this up to the max:
  • If you're using a standalone version of an instrument that also has a plugin version,  you might want to try using the plugin version of the instrument in VSTHost instead. VSTHost has the option to adjust its sample buffer, which might give you enough breathing room to avoid audio glitches. See Part 1 of this series for some more information on VSTHost.
    The VSTHost Wave Devices dialog has a sample buffer setting that many other hosts and standalone instruments don't have..

GETTING SAMPLE START AND STOP TIMES RIGHT

By default, SampleRobot auto-detects "note in" and "note out" times in your initial sample recordings so that when you export your sounds, they start right when an actual audible signal starts, and only run as long as the audible content plays. (In other words, SampleRobot may record an 8-second long recording of a 1-second drum hit, but when you export the sound with autodetection enabled, the exported sample will only contain that 1 second of audible audio.)

The default settings usually work just fine for the VB-Cable methods I described earlier, and for the Digital version of the interface-to-interface method, but I've found that sometimes it's not all that accurate when doing the Analog method, likely because of the tiny amount of noisefloor that's almost always present in analog recordings.

In the Multi-Sample RECORD Settings portion of SampleRobot, you will find the Thres.Prec.In and Thres.Prec.Out settings. These affect how sensitive SampleRobot is to the differences in the audio signal between silence and audible sound. If you find that SampleRobot isn't setting the sample start times properly in your exported sounds, try adjusting the Thres.Prec.In value to something lower than the default value of 0.90. If SampleRobot is ending your exported samples before the audible sound has finished (especially common on reverb tails), try adjusting the Thres.Prec.Out value with something lower than the default of 0.50.

Note that you have to change these settings BEFORE you record a multi-sample. So this means you might have to go through several passes of recordings as you experiment with different values. As you do this, it's REALLY important to remember that SampleRobot's default behavior is to skip any samples that have already been recorded. So remember to disable this option if you have to re-record some samples:
The Latency value in that window also has to do with auto-detection (it seems to have some relationship with note-out detection), but I'm told the default value of 21ms should be fine for most modern interfaces.

If the auto-detection simply isn't working out perfectly for you, you can always manually tweak the note-in/note-out points on a per-sample basis before exporting. On the virtual keyboard on the bottom of the SampleRobot window, right-click the sample you'd like to adjust. A little "E" will appear under that sample in the virtual keyboard, and your sample's waveform will appear in the Note/Loop/Release Editor. It's a tiny window, but you can zoom horizontally and vertically by right-dragging your mouse in the editor window, and you can pan the view backward and forward by left-dragging in the view. The N. IN and N. OUT sliders set the start and end points, respectively.

WRAP-UP

This marks the end of my biggest tutorial yet. Please let me know if you think I've missed something, or if you've got any tips of your own.

Recording Virtual Instruments with SampleRobot Part 5: Interface to Interface (Digital)

This is Part 5 of a 6-part series. Make sure to check out Part 1 for the introduction.

Method Four of Four: Interface to Interface (Digital)

  • Difficulty: Medium
  • Advantages: Highest quality recordings possible. Usually little-to-no tweaking required in RoboSampler to get recording volumes or export note-in/note-out times right.
  • Disadvantages: Expensive! (Requires two audio interfaces that both have the same kind of digital I/O, along with the right cables.
  • Software Required: LoopBe1 (only necessary if your interfaces don't have physical MIDI ports), SampleRobot (any edition)
  • Hardware Required: Two audio interfaces that support the same kind of digital I/O (ADAT, S/PDIF, etc.), and the correct cables needed for a digital connection. If your audio interfaces don't have built-in MIDI ports, you will also need some kind of USB-to-MIDI interface like the MOTU FastLane USB or the MOTU micro lite.
If you have two audio interfaces with the same kind of digital inputs and outputs, you can skip all the virtual audio cables and ASIO wrappers and make a purely digital audio connection from one interface to the other, resulting in the best recording quality you can get. Things get even simpler if your audio interfaces happen to have physical MIDI ports (or if you have more than one discrete USB-to-MIDI interface). That way you don't even have to mess with virtual MIDI cables, and have a straightforward hardware-to-hardware solution. Actually, as long as both the MIDI and audio connections between your virtual instrument and SampleRobot are interface-to-interface, the plugin and SampleRobot don't even have to be on the same computer or operating system! For simplicity's sake, I'm going to describe things as if everything's done on the same PC, but it would be super easy to adjust for a multi-computer setup.

In this model, one audio interface plays your instrument's audio. We'll call that the Instrument Interface. We'll call the other interface, the one SampleRobot uses to record the incoming audio, the SampleRobot Interface. As far as MIDI goes, the Instrument side is the one receiving MIDI signals, and the SampleRobot side is the one sending MIDI out.

My desktop audio interface is a MOTU Track 16 and I use an RME Fireface UFX for most recording work. Both interfaces have MIDI in and out ports, and they also both have optical ADAT ports which I used while putting together this tutorial. In my example, the MOTU will be my Instrument Interface, and the RME will serve as the SampleRobot interface. Here's the basic signal flow:

This diagram assumes both interfaces also have MIDI ports. The steps that follow will include instructions for other configurations.
Here's how to do it:
  1. First make your physical MIDI connections. You want to run a MIDI cable from the MIDI OUT port of your SampleRobot interface into the MIDI IN port of your Instrument Interface. If you have a standalone USB-to-MIDI interface like the MOTU FastLane USB or the MOTU micro lite , you can use those too- just remember which one is going to be for sending MIDI data out (SampleRobot), and which one will be receiving (Intrument).

    If you don't have enough physical MIDI ports in order to make a hardware MIDI connection, you'll need to use a virtual MIDI connection. In that case, download and install LoopBe1 now. Note: Restart your computer after installing LoopBe1.
  2. Next make your physical digital audio connections. The kind of cables you use depends on your interfaces and the type of digital ports they have. My interfaces both have optical "TOSLINK" style ports for ADAT audio. I picked up a 2-pack of BlueRigger cables for this. When hooking things up, just remember- the audio signal goes out from your Instrument interface into your SampleRobot interface.
  3. Now launch your plugin host or standalone instrument. In this example, I'm running the standalone version of UVI Workstation, and sampling the Prime8 instrument from their UVI Urban Suite.
    UVI Workstation with the Prime8 program from UVI Urban Suite.
  4. Open your instrument's MIDI settings and make sure your Instrument-side MIDI interface is available, whether it's a physical interface or LoopBe1. Also ensure that the instrument is receiving MIDI on the correct IN port, if the interface has more than one.
    In UVI Workstation, I went to File > Audio and MIDI Settings > MIDI Devices and chose my Instrument Interface's MIDI port.
  5. Open your instrument's Audio settings and select the correct audio outputs for your Instrument Interface. Depending on your interface's drivers and the specific instrument or host you're using, you may have multiple output options to choose from for the same physical ports. If this happens, make sure to pick the ASIO option, when available.
    Depending on how your interface, instrument, or plugin host are designed, you might have to select the device on one page, and select the actual output ports on another. For example, your instrument might have a "Routing" page where you pick which audio ports to assign to different instruments. Make sure to select the digital outputs you plan to use for recording.
    UVI Workstation has a separate Routing page. Here I selected my ADAT outputs for the whole instrument's main outputs.
  6. With digital connections, you usually have to decide how the clock signal is sent. Most interfaces with digital support can either send their own clock signal (to control the other device), or receive a clock signal from the remote device or some other source. I decided to make my Instrument Interface the clock source.

    Note
    If your instrument or plugin host doesn't have a "Control Panel" function to launch your interface's control panel, you might have to launch it separately, or temporarily even load another application, like a DAW, that gives you access to the control panel. In fact, when making this tutorial, I had to quit UVI Workstation in order to launch the MOTU Audio Console for this screenshot.
    The Track16 will use its internal clock to control the digital connection.
  7. Now launch SampleRobot and set up your typical project recording settings. When you've got your note range and velocity settings the way you like them, make sure to specify the following:

    MIDI Out Device: Your SampleRobot Interface's MIDI Out port. (Or LoopBe1 if you're going the virtual route.)
    Audio Format: The Sample rate and bit depth that you'd like to record. (Remember only the Pro and Sampling Suite versions of SampleRobot can record higher than 16-bit.)
    Audio In Device: Your SampleRobot Interface's digital inputs. SampleRobot might list more than one option for your specific input type; select the ASIO version when available.

    I selected the ASIO Fireface Adat 1 & 2 option.
  8. Click the tiny CP button in the Audio In Device section to bring up your SampleRobot Interface's control panel. You need to make sure it's using a clock setting that's compatible with how you configured your Instrument Interface. Since I chose my Instrument interface to be the clock source, I made my SampleRobot interface the clock receiver.
    With this setting, the RME interface listens for a clock signal on its ADAT port instead of using its internal clock.
  9. Now that your project is all ready to record, back in SampleRobot click Rec in the Projects window, and then click Start Recording. You probably won't hear anything while recording is in progress, unless you use your interface's routing capabilities to set up a monitoring submix. When recording is complete, little waveforms will appear under the virtual keyboard. You can test the recorded samples by clicking (and holding down) the left mouse on individual notes.
  10. If your samples seem to have completed successfully, go to the Import/Export menu to export the samples into your desired target format. If you're using the default settings, your exported samples will be trimmed down to only contain actual audible audio (which is good!). I like to save my exported files into a new folder called Exports inside my SampleRobot project's Data Path folder. Here's a look at the resulting samples I got after exporting the above project. I am using Resonic Player to preview my samples.

NEXT TUTORIAL


Recording Virtual Instruments with SampleRobot Part 4: Interface to Interface (Analog)

This is Part 4 of a 6-part series. Make sure to check out Part 1 for the introduction.

Method Three of Four: Interface to Interface (Analog)

If you have more than one hardware audio interface, you can skip all the virtual audio cables and ASIO wrappers and route your virtual instruments out of the analog outputs of one interface into the inputs of another interface. One particularly nice thing about this approach is that you can optionally route the audio signal through outboard sound processors to add a little analog warmth to your digital instruments before the signal hits your target interface's inputs. Things get even simpler if your audio interfaces happen to have physical MIDI ports (or if you have more than one discrete USB-to-MIDI interface). That way you don't even have to mess with virtual MIDI cables, and have a straightforward hardware-to-hardware solution. Actually, as long as both the MIDI and audio connections between your virtual instrument and SampleRobot are interface-to-interface, the plugin and SampleRobot don't even have to be on the same computer or operating system! For simplicity's sake, I'm going to describe things as if everything's done on the same PC, but it would be super easy to adjust for a multi-computer setup.
  • Difficulty: Medium
  • Advantages: High quality recordings with a low level of complexity. Ability to route your plugin audio through hardware processors.
  • Disadvantages: Expensive! (Requires two audio interfaces.) Might require a little bit of tweaking to get SampleRobot's note-in/note-out auto-detection working as expected.
  • Software Required: LoopBe1 (only necessary if your interfaces don't have physical MIDI ports), SampleRobot (any edition)
  • Hardware Required: Two audio interfaces, and the correct audio cables for their respective inputs/outputs (most interfaces work well with balanced TRS-to-TRS cables). If your audio interfaces don't have built-in MIDI ports, you will also need some kind of USB-to-MIDI interfaces like the MOTU FastLane USB or the MOTU micro lite.

In this model, one audio interface plays your instrument's audio. We'll call that the Instrument Interface. We'll call the other interface, the one SampleRobot uses to record the incoming audio, the SampleRobot Interface.

My desktop audio interface is a MOTU Track 16 and I use an RME Fireface UFX for most recording work. In my example, the MOTU will be my Instrument Interface, and the RME will serve as the SampleRobot interface. Here's the basic signal flow:

This diagram assumes both interfaces also have MIDI ports. The steps that follow will include instructions for other configurations.
Here's how to do it:
  1. First make your physical MIDI connections. You want to run a MIDI cable from the MIDI OUT port of your SampleRobot interface into the MIDI IN port of your Instrument Interface. If you have a standalone USB-to-MIDI interface like the MOTU FastLane USB or the MOTU micro lite , you can use those too- just remember which one is going to be for sending MIDI data out (SampleRobot), and which one will be receiving (Intrument).

    If you don't have enough physical MIDI ports in order to make a hardware MIDI connection, you'll need to use a virtual MIDI connection. In that case, download and install LoopBe1 now. Note: Restart your computer after installing LoopBe1.
  2. Next make your physical audio connections. If you are just recording direct from one interface to the other, run the proper kind of audio cables from the outputs of your Instrument interface to some inputs on your SampleRobot interface.

    If you intend to do some processing in between, just patch things up like this: Instrument Interface Audio Out to Processor Audio In, Processor Audio Out to SampleRobot Interface Audio In.
  3. Now launch your plugin host or standalone instrument. I'm going to be running an instance of Waldorf Attack inside VSTHost. (See Part 1 of this tutorial series for tips on setting up VSTHost.)
  4. Open your instrument's MIDI settings and make sure your Instrument-side MIDI interface is available, whether it's a physical interface or LoopBe1. Also ensure that the instrument is receiving MIDI on the correct IN port, if the interface has more than one.
    In VSTHost, I've already made sure my MIDI devices were available/selected in the Devices > MIDI > MIDI Input Devices screen. Now I've clicked the MIDI In jack on my Attack node and I've selected the Track16 port as my Intrument-side MIDI port.
  5. Open your instrument's Audio settings and select the correct audio outputs for your Instrument Interface. Depending on your interface's drivers and the specific instrument or host you're using, you may have multiple output options to choose from for the same physical ports. If this happens, make sure to pick the ASIO option, when available.
    VSTHost offered me many output options! I had to make sure to pick the ASIO output for my MOTU interface.
  6. Now launch SampleRobot and set up your typical project recording settings. When you've got your note range and velocity settings the way you like them, make sure to specify the following:

    MIDI Out Device: Your SampleRobot Interface's MIDI Out port. (Or LoopBe1 if you're going the virtual route.)
    Audio Format: The Sample rate and bit depth that you'd like to record. (Remember only the Pro and Sampling Suite versions of SampleRobot can record higher than 16-bit.)
    Audio In Device: Your SampleRobot Interface's analog inputs.

    All ready to go!
  7. Now that your project is all ready to record, click Rec in the Projects window, and then click Start Recording. You probably won't hear anything while recording is in progress. When recording is complete, little waveforms will appear under the virtual keyboard. You can test the recorded samples by clicking (and holding down) the left mouse on individual notes.
  8. If your samples seem to have completed successfully, go to the Import/Export menu to export the samples into your desired target format. If you're using the default settings, your exported samples will be trimmed down to only contain actual audible audio (which is good!). The final post in this series, Part 6, has some tips for tweaking SampleRobot's note-in/note-out detection to speed up the export process. I like to save my exported files into a new folder called Exports inside my SampleRobot project's Data Path folder. Here's a look at the resulting samples I got after exporting the above project. I am using Resonic Player to preview my samples.

NEXT TUTORIAL


Recording Virtual Instruments with SampleRobot Part 3: Virtual Audio Cable with ASIO

This is Part 3 of a 6-part series. Make sure to check out Part 1 for the introduction.

Method Two of Four: Virtual Audio Cable with ASIO

While complex, this method enables you to record into SampleRobot at a higher bit-depth than using a virtual audio cable directly. Some of these steps have to be performed in a certain order. If you accidentally do something out of sequence and you find you're not able to get audio to record, you might have to reboot your computer (or at least restart your applications) and try again.
  • Difficulty: Advanced
  • Advantages: Enables recording at higher bit depths than using Windows audio directly.
  • Disadvantages: Lots of steps to set up (and following proper sequence of steps is important). Only worthwhile on SampleRobot Pro or Sampling Suite (the other editions are limited to 16-bit recording). May involve some trial-and-error getting reliable results. Sometimes audio stops working, requiring system restarts.
  • Software Required: VB-CABLE, LoopBe1, ASIO4ALL, SampleRobot (Pro or Sampling Suite recommended)
The instrument I recorded while making the screenshots below was the standalone version of Native Instruments Maschine . The exact MIDI and audio options in your instrument or plugin host might have different names from what you see in the pictures.
  1. Install VB-CABLE if you haven't already. You only need the single "VB-CABLE Driver" version, not the "hi-fi" one.
  2. Install LoopBe1 if you haven't already.
  3. Install ASIO4ALL if you haven't already.
  4. If you just installed any of the above software packages, restart your computer now. You will almost certainly not be able to finish these steps unless you restart your PC at least once.
  5. Make sure no other audio apps are running before launching SampleRobot, and then click the little window under where it says Audio In Device. A list of available devices appears. Select any entry in the list that begins with "ASIO4ALL" and then click OK.
    The arrow points to where you should click to select a device. Any "ASIO4ALL" option will work for this step. Also note the little CP button in the lower left of the Audio In Device pane.
  6. Click the tiny CP button next to the Audio In Device entry you just selected to open the ASIO4ALL control panel. If the Advanced Options button (the big wrench in the lower right) doesn't have a big red X on it, click it once to display the advanced options.
    Your initial settings will look something like this.
  7. To start off with the ASIO4ALL configuration, first disable ALL devices currently enabled. (Click the little power buttons next to any highlighted devices until they are all turned off/unlit. Also, expand any nodes marked with a + sign and make sure their sub-devices are disabled as well.) Next, expand the VB-Audio Virtual Cable node and make sure that only the In option is enabled (do not enable the Out option). Finally, select the In entry under VB-Audio Virtual Cable and move the ASIO Buffer Size slider all the way to the right, for the maximum sample buffer size of 2048 Samples. When you've done everything right, it should look like this:


  8. Once your ASIO4ALL settings are correct, close the ASIO4ALL control panel and then close SampleRobot. This unloads the ASIO4ALL driver, ensuring that it uses your new settings the next time you run SampleRobot.
  9. Launch SampleRobot again and start a new project, either by clicking New in the Projects window or going to File > Project Wizard. Regardless of whether you use the wizard or set your options manually, make sure to choose the following options:

    Audio In Device: ASIO4ALL v2 - VB-Audio Point 1+2
    Audio Format: 44.1KHz, Stereo, 24bit
    MIDI Out Device: LoopBe Internal MIDI
  10. In my screenshot below you can see I've also selected the following:

    Attack Vel: 127
    Note Length: 8 seconds
    Project Settings > Data Path: (a unique folder for this project)
    Note Range: 36/C1 through 51/D#2, 16 notes total, all notes in range selected. (This is the default note range for a Maschine kit.)

  11. Open up the Sound control panel in Windows and locate the CABLE Input device on the Playback tab. Select CABLE Input, and then click Properties.
  12. On the CABLE Input Properties dialog, click the Advanced tab and then select 24-bit, 44100 Hz (Studio Quality) under Default Format. Click OK, and then click OK again.
  13. Start up the instrument you would like to record. If it comes in a standalone EXE version, launch that. Otherwise, load the plugin into your VST host of choice. See part 1 of this series for steps on loading a plugin with VSTHost. Also, don't forget to load up the patch you intend to record!
    Maschine, with Drop Kit loaded from the Lucid Mission expansion pack. The Group MIDI settings are set up so that each incoming MIDI note triggers a different Maschine pad.
  14. Locate your instrument's/host's MIDI input settings (in Maschine standalone, you go to File > Audio and MIDI Settings > MIDI > Inputs), and make sure that the option for LoopBe Internal MIDI is enabled. In Maschine you do this by setting the port's Status value to On.

  15. Locate your instrument's/host's audio device settings (in Maschine standalone, it's File > Audio and MIDI Settings > Audio) and make sure to select a Windows Audio driver type (it might be named WASAPI, Wave, WME, Windows Audio, or something similar) and select VB-Audio Virtual Cable as the audio device.

  16. Depending on how your instrument or host works, you might also have to specify how audio from the instrument gets routed. For example, in Maschine, we have to select the Routing > Outputs tab and make sure the main outputs go to the Cable Input L and R.

  17. Switch back to SampleBot. Now that your project is all ready to record, click Rec in the Projects window, and then click Start Recording. You probably won't hear anything while recording is in progress. When recording is complete, little waveforms will appear under the virtual keyboard. You can test the recorded samples by clicking (and holding down) the left mouse on individual notes.
  18. If your samples seem to have completed successfully, go to the Import/Export menu to export the samples into your desired target format. If you're using the default settings, your exported samples will be trimmed down to only contain actual audible audio (which is good!). I like to save my exported files into a new folder called Exports inside my SampleRobot project's Data Path folder. Here's a look at the resulting samples I got after exporting the above project. I am using Resonic Player to preview my samples.

NEXT TUTORIAL